D-Star & Hotspots · Part 2 of 3
Pi-Star D-Star Hotspot, Part 2: Pi-Star Configuration and D-Star Registration
Glossary — read this first
- Reflector
- An internet meeting point where hotspots and repeaters connect. The ARRG.US array uses XLX reflectors such as XLX102.
- RPT1 module letter
- Identifies the band your hotspot emulates:
B= 70 cm,C= 2 m,A= 23 cm. Must match what you program in your radio. - D-Star registration
- One-time callsign enrollment at regist.dstargateway.org. Unregistered call signs are blocked from the global gateway network.
- ircDDBGateway
- The Pi-Star component that connects your hotspot to the D-Star gateway and reflector network.
You assembled the hardware and reached the Pi-Star dashboard in Part 1. Part 2 configures the hotspot for D-Star, links it to a reflector, and walks through D-Star gateway registration. None of this requires your Icom radio yet — that is Part 3.
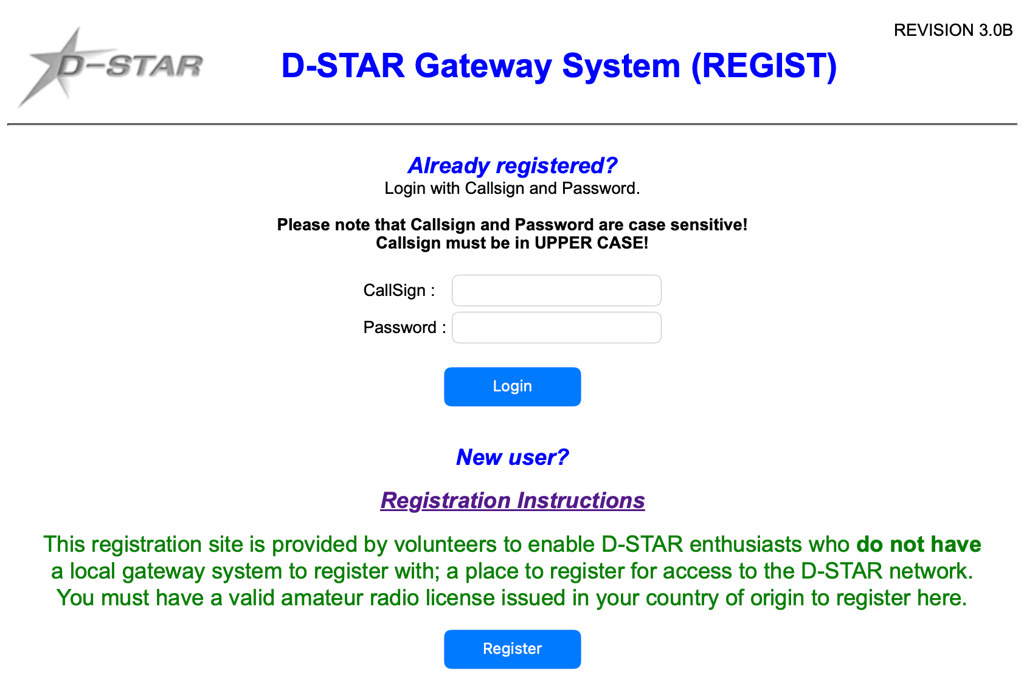
Register Your D-Star Callsign
D-Star gateways require one-time registration. Register on any gateway once; approval covers the global D-Star network. Complete this before expecting reflector QSOs to work.
Step 1: Submit your registration
- Browse to regist.dstargateway.org.
- Click Register under New User?
- Enter your call sign in UPPER CASE.
- Enter a valid email address.
- Choose a password and record it securely.
- Read the agreement, select YES, and submit.
- Wait for the approval email. If none arrives, try logging in — approval may already be complete.
Already registered elsewhere? Do not submit a second request. One registration works across all gateways.
Step 2: Create terminal entries (critical)
After approval, log in and create two terminal entries:
- Terminal 1 — Check box
1. In Initial, enter a single space (press space once). Do not check AccessPoint. - Terminal 2 — Check box
2. In Initial, enterZ. Check AccessPoint. - Click Update.
Terminal 1 is your main radio identity. Terminal 2 with AccessPoint is what hotspots and gateway software expect. Skipping the space in Terminal 1 or forgetting AccessPoint on Terminal 2 is the most common registration mistake.
Video walkthroughs: official registration instructions. Verify registration with pistar.uk/d-star_regcheck.php.
Configure Pi-Star for D-Star
All settings live in the web dashboard at http://pi-star.local/admin/. Open
Configure → Configuration and work top to bottom, clicking
Apply Changes after each section. These steps assume a personal simplex UHF
hotspot running D-Star only.
Choosing a Simplex Frequency
A hotspot is a simplex node: your radio and the MMDVM board transmit and receive on the same frequency with no repeater offset. Pick a frequency before you fill in Radio Frequency below — it must match the DV memory you program in Part 3 exactly.
UHF (70 cm) hotspots
Most Pi-Star D-Star builds in the US run UHF. 438.8000 MHz is the de facto
hotspot simplex across much of the country — quiet enough for digital use and far from the
446.000 MHz national FM simplex calling channel. If several operators in your area already
use 438.8000, pick another unused simplex slot a few kHz away (for example
438.8125 or 438.8250) so your transmissions do not collide on the air.
- Check your local band plan. The US 70 cm band mixes repeater segments, weak-signal, and simplex. Your frequency must be inside a segment where you are allowed to operate at your license class and that is not reserved for repeater inputs or outputs in your region. Your club or state frequency coordinator is the authoritative source.
- Listen before you transmit. Tune a handheld, mobile, or SDR to the candidate frequency for several minutes. Repeaters, other hotspots, and FM simplex traffic should be absent or rare.
- Stay off repeater pairs. Do not park a hotspot on a known repeater output (commonly 443–449 MHz in many US areas) or you will key up someone’s local machine every time you use the reflector.
- Verify TX with a second receiver. After Pi-Star is running, confirm the hotspot actually transmits on the frequency you configured — not a typo or an offset left over from a repeater template.
- Write it down. You will enter the same value in Pi-Star and in CS-51/CS-52; a mismatch is the most common reason a configured hotspot appears deaf.
VHF (2 m) hotspots
If your MMDVM hat is VHF-only, use a 2 m simplex frequency permitted in your area
(examples: 145.6000 or 145.6700 MHz) and set RPT1 module
C in the D-Star section below. Avoid 146.520 MHz (national FM calling) and
any frequency your local repeaters use.
Controller Software
- Controller Software —
MMDVMHost. - Mode — Simplex Node (unless running a duplex repeater hat).
- Click Apply Changes.

MMDVMHost and Simplex Node, then click Apply Changes.MMDVMHost Mode
- Enable D-Star Mode.
- Set RF Hang Time and Net Hang Time to at least
5seconds (10 is a safe default). - Disable unused modes (DMR, YSF, P25, NXDN) on a Pi Zero to save CPU.
- Click Apply Changes.
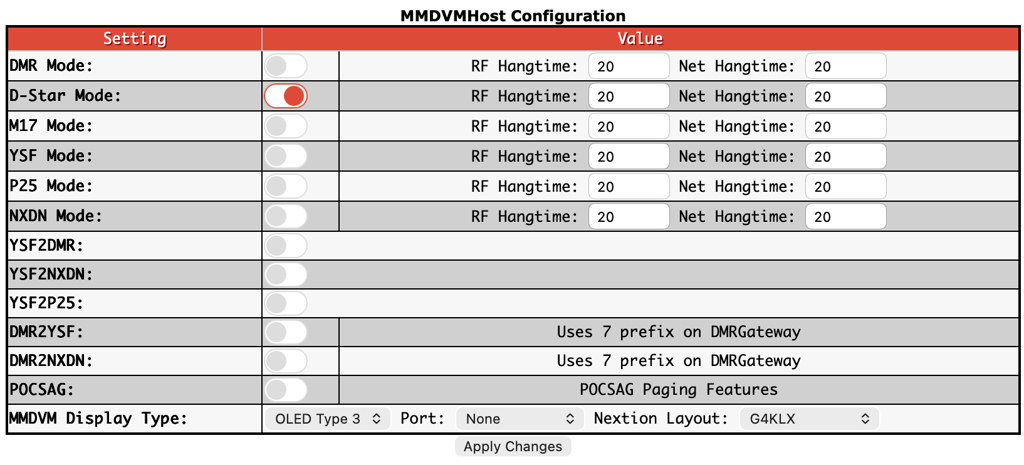
5 seconds.General Configuration
- Node Callsign — Your FCC call sign only (example:
KC4SMH). No suffixes. - Radio Frequency — Simplex frequency in MHz (example:
438.8000). Must match the radio memory in Part 3. - Latitude / Longitude / Town / Country — Your QTH for gateway maps.
- Radio/Modem Type — Match your hardware (
MMDVM_HS_Hat,MMDVM_HS_Dual_Hat,DVMEGA, etc.). - Node Type — Private for a personal hotspot.
- System Time Zone — Example:
America/New_York. - Click Apply Changes.
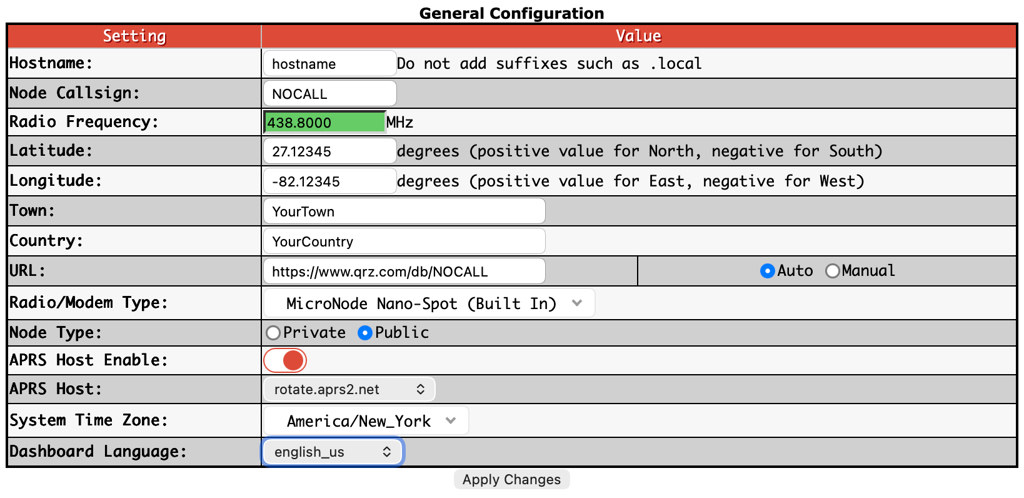
438.8000 MHz shown), modem type, and node type. Hostname uses hostname and Node Callsign uses NOCALL as placeholders.D-Star Configuration
- RPT1 Callsign module — Band letter matching your frequency:
B= 70 cm (UHF) — most ID-51/ID-52 buildsC= 2 m (VHF)A= 23 cm
- Default Reflector — ARRG.US operators commonly use
XLX102moduleB. Pick any XLX module on the array that fits your operating habits. - Link at startup — Startup for automatic connect on boot, or Manual to link from the dashboard.
- Click Apply Changes.
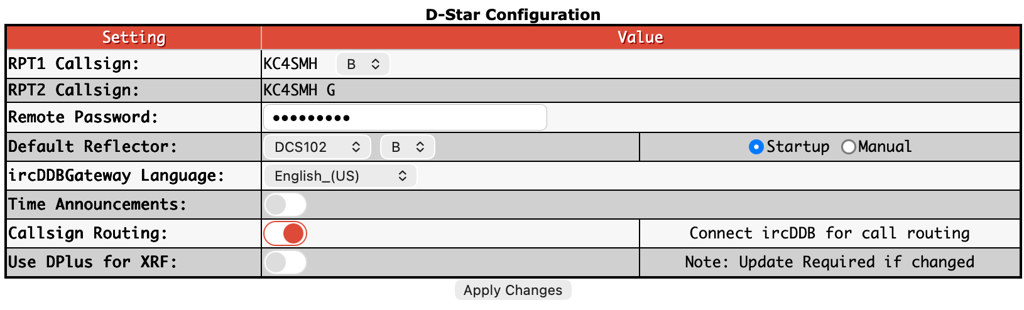
B, default reflector with module letter, and Startup link. Use an XLX reflector (for example XLX102) instead of DCS if that is what your network uses.Display and verification
- Under Display Options, set OLED type if applicable (commonly
OLED 0.96). - Reboot from the admin menu.
- Open Admin. Confirm D-Star and D-Star Net are green.
- The dashboard footer should show your linked reflector (example:
XLX102B).
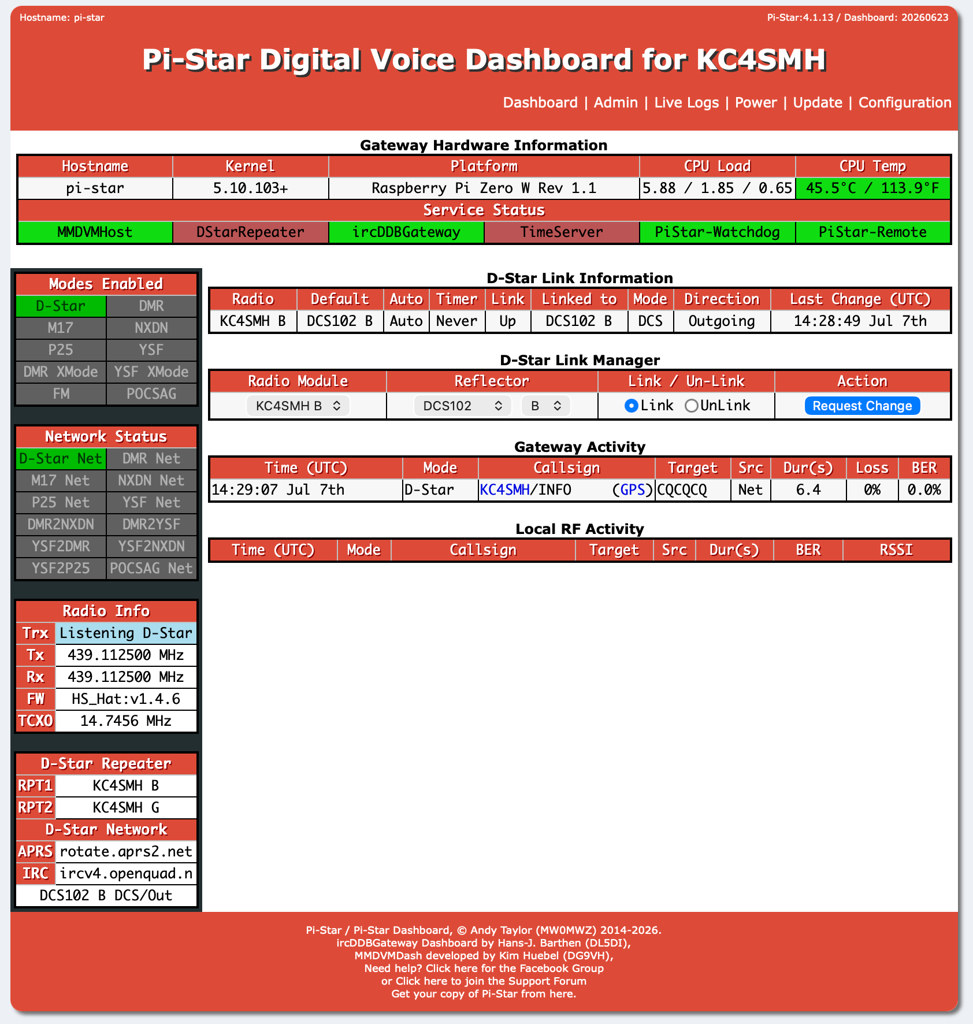
Write down your frequency, module letter, and reflector choice. You will need all three when programming the Icom radio in Part 3.
Troubleshooting
| Symptom | Likely cause | Fix |
|---|---|---|
| D-Star / D-Star Net not green | D-Star mode disabled or ircDDBGateway fault | Re-enable D-Star; reboot; check Pi-Star forum if persistent |
| Reflector will not link | Wrong reflector name or network outage | Confirm XLX name and module; try manual link from Admin |
| Dashboard shows TX; no gateway audio | D-Star registration incomplete | Finish terminal entries; run pistar.uk regcheck |
| Pi-Star reboot loops | Weak power supply or bad SD card | Official Pi PSU; reflash a name-brand card |
| OLED blank on Ethernet | Display quirk on some hat firmware | Use Wi-Fi for OLED, or rely on web dashboard |
After Configuration
Pi-Star and registration are done. Part 3 adds your Icom handheld to the RF link.
Next in this series
Pi-Star is configured and your call sign is registered. Continue to Part 3: Icom ID-51 / ID-52 Radio Configuration to program the DV memory channel that talks to your hotspot.